Here’s something that’ll blow your mind: the way fintech companies decide whether to lend you money is getting a serious upgrade. And I’m not talking about minor tweaks to old formulas — I’m talking about reinforcement learning algorithms that literally learn from every lending decision they make.
How to Restore Old Photos Using AI Enhancement Software
on
Get link
Facebook
X
Pinterest
Email
Other Apps
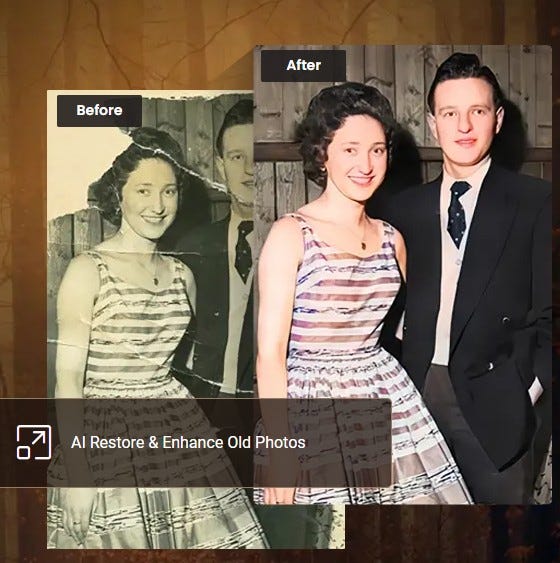
Found a box of old family photos in your grandma’s attic? Or maybe you’ve been putting off scanning those faded wedding pictures from the ’80s because they look absolutely terrible? Yeah, I get it. Those memories deserve better than slowly decaying into oblivion, and honestly, AI photo restoration has become so good that it’s almost unfair to the professional restoration artists who spent years mastering this skill.
I’ve restored hundreds of old photos over the past few years — everything from my great-grandfather’s military portraits to my parents’ hilariously outdated wedding shots. Let me walk you through exactly how to bring those memories back to life without spending a fortune or needing a PhD in Photoshop.
Restore Old Photos Using AI
Why AI Restoration Beats Traditional Methods
Look, traditional photo restoration is an art form. Those people who manually clone-stamp and paint over damaged areas for hours? They’re incredibly skilled. But let’s be real — most of us don’t have 10+ hours to spend on a single photo, and we definitely don’t have the budget to pay someone $50–200 per image.
AI restoration tools can handle in minutes what used to take hours. They’ve been trained on millions of photos to recognize patterns of damage and understand how to intelligently fill in missing information. It’s not perfect, but it’s shockingly effective for most common issues.
What AI Can Actually Fix
Here’s what modern AI restoration excels at:
Scratches and tears — Even major damage can be seamlessly repaired
Fading and discoloration — Bringing back color vibrancy
Noise and grain — Smoothing out that old film grain
Blur and soft focus — Sharpening details that time has softened
Missing sections — Intelligently filling in damaged areas
Color correction — Fixing weird color shifts from aging
What it struggles with? Completely obliterated sections with zero context, extremely low-resolution sources, and photos with unusual artistic techniques that the AI wasn’t trained on.
Step 1: Scanning Your Photos the Right Way
Before you can restore anything, you need a digital copy. And trust me, how you scan makes a massive difference in your final results.
Scanner Settings That Matter
I learned this the hard way after scanning an entire album at terrible settings and having to redo everything. Here’s what actually works:
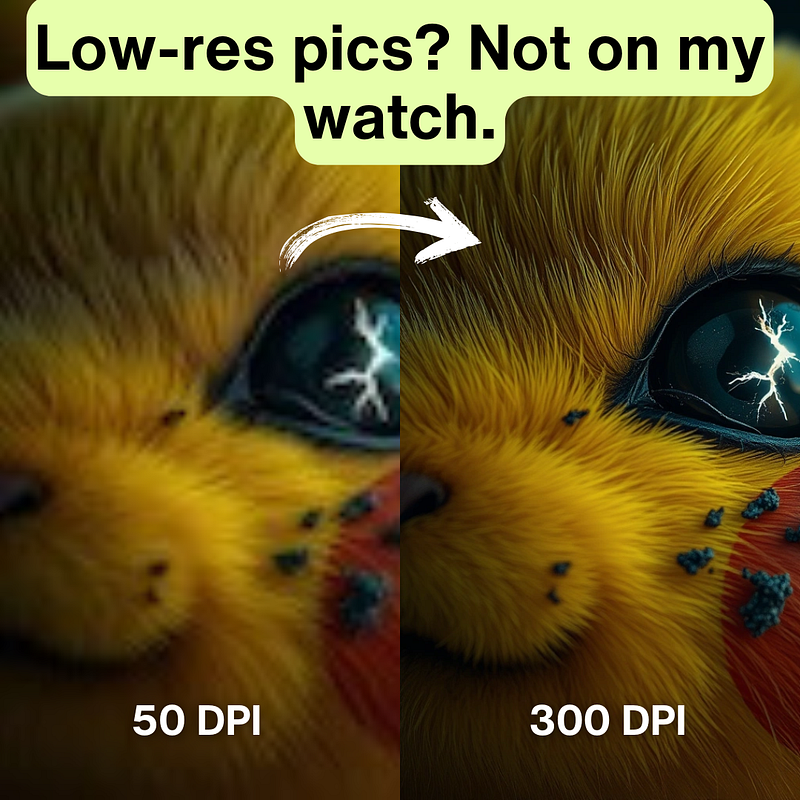
Resolution:
Minimum: 300 DPI for standard prints
Better: 600 DPI for small or damaged photos
Best: 1200 DPI if you want to print large or the original is tiny
Don’t go crazy with 2400+ DPI unless you’re dealing with slides or negatives. The file sizes become unwieldy, and you won’t see meaningful improvements.
Color Depth:
Use 24-bit color (8 bits per channel) minimum
48-bit is overkill for most restoration work
For black and white photos, 16-bit grayscale is plenty
File Format:
Scan as TIFF or PNG (lossless formats)
Never scan directly to JPEG — you’re throwing away data immediately
You can convert to JPEG later after restoration if needed
The Scanning Process
Clean your scanner glass first. Seriously. That dust speck you ignore becomes a massive artifact when you’re working at 600 DPI.
Place photos face-down carefully, close the lid gently (don’t press down on fragile photos), and scan in a well-lit room so you can see what you’re doing. I’ve accidentally scanned photos upside-down more times than I care to admit. :/
If your photo is damaged, scan it as-is. Don’t try to flatten creases or tape tears before scanning — you might cause more damage, and AI can handle these issues digitally.
Step 2: Choosing Your AI Restoration Software
Alright, let’s talk tools. I’ve tried pretty much everything on the market, and here’s my honest take on what actually works.
Remini — The Mobile-First Option
Price: Free with limits, $5/week for unlimited Platform: iOS, Android, Web
Remini is stupid easy to use. Like, your grandma could figure it out. Upload a photo, tap “enhance,” wait 10 seconds, done. The face enhancement is legitimately impressive — I’ve seen it bring detail to blurry faces that shouldn’t even be possible.
Pros:
Incredibly simple interface
Fast processing
Excellent for portraits and faces
Mobile-friendly for on-the-go restoration
Cons:
Can over-enhance and create artificial-looking results
Limited control over the process
Subscription adds up if you use it regularly
Sometimes invents details that weren’t there (which is… concerning for accuracy)
I use Remini for quick restorations when I’m showing relatives progress on their photos. It’s instant gratification, but not always my final output.
MyHeritage Photo Enhancer — The Genealogy Specialist
Price: Free for 10 photos, subscription required for more Platform: Web-based
MyHeritage built this tool specifically for genealogists restoring family photos, and it shows. The colorization is particularly good for period-accurate colors, and the face enhancement doesn’t go overboard with smoothing.
What I like:
Specialized for old family photographs
Conservative enhancement (faithful to originals)
Colorization with historical accuracy
Animation feature (Deep Nostalgia) is fun
Handles various damage types well
What’s annoying:
Requires subscription after initial free photos
Processing can be slow during peak times
Limited advanced controls
For family history projects, this is my go-to. The results just feel right for old photos in a way some other tools don’t.
Photoshop Neural Filters — The Professional Option
Price: Included with Creative Cloud ($54.99/month Photography plan) Platform:Desktop (Windows/Mac)
If you’re already a Photoshop user, the Neural Filters offer powerful restoration capabilities integrated into your existing workflow. The Smart Portrait adjustments and restoration filters are continuously improving.
Key features:
Deep integration with Photoshop’s other tools
Non-destructive editing workflow
Advanced control over every parameter
Professional color management
Access to other restoration tools in one package
The reality:
Steep learning curve if you’re new to Photoshop
Subscription cost is high for casual use
Neural Filters still feel somewhat beta-ish
Requires decent computer hardware
I use Photoshop for complex restorations where I need fine control, but it’s definitely overkill if you just want to fix up a few family photos. IMO, the Adobe tax isn’t worth it unless you’re already committed to their ecosystem.
VanceAI focuses specifically on restoration and does it really well. The interface is straightforward, processing is fast, and results are consistently good without being overly aggressive.
Why it’s solid:
Multiple restoration models for different damage types
Batch processing available
Reasonable pricing structure
Doesn’t over-process images
Old photo colorization included
Limitations:
Credit system can feel restrictive
Web-only (no offline processing)
Less name recognition than competitors
This is what I recommend to people who want better results than Remini but don’t need Photoshop-level control. The middle ground sweet spot.
Hotpot.ai — The Budget-Friendly Web Option
Price: Free with watermarks, $10/month premium Platform: Web-based
Hotpot offers a surprising number of AI tools including photo restoration, and the free tier actually lets you test it thoroughly before committing.
The good stuff:
Generous free tier for testing
Fast processing
Multiple AI tools in one platform
Simple, clean interface
The not-so-good:
Results are hit-or-miss depending on image
Free version adds watermarks
Less sophisticated than specialized tools
Great for experimenting or occasional use. Not what I’d choose for precious family heirlooms.
Step 3: The Actual Restoration Process
Now let’s get into the nitty-gritty of actually restoring photos. This is where technique matters more than just throwing AI at the problem.
Starting with the Right Foundation
Before you upload anything to an AI tool, do basic cleanup first if you’re comfortable with it:
Crop out borders — Scanner edges and photo borders add nothing
Straighten the image — Most tools have auto-straighten
Adjust levels roughly — Don’t go crazy, just get it in the ballpark
Remove large debris — If there’s a huge hair across the scan, clone-stamp it out
Don’t spend hours on manual fixes. The AI will handle most damage. But removing obvious junk helps it focus on actual photo restoration rather than cleaning up your scanning mistakes.
Working in Stages
Here’s my workflow that actually works:
Stage 1: Damage Repair Upload to your chosen restoration tool and run damage repair first. This fixes scratches, tears, and missing sections. Save this as a separate file.
Stage 2: Enhancement Take your repaired image and run enhancement passes for sharpness, noise reduction, and detail recovery. Don’t max out all sliders — subtlety matters. Save another version.
Stage 3: Color Correction If working with color photos, now address fading and color shifts. For black and white, consider colorization separately (more on that later).
Stage 4: Final Touches This is where manual intervention helps. Crop for composition, adjust contrast, remove any AI artifacts that look weird.
Why stages matter: Running everything at once often creates over-processed images. Building up restoration gradually gives you more control and better results.
The Settings That Actually Matter
Every tool has different controls, but here’s what to focus on:
Scratch Removal Intensity: Start low (30–40%) and increase only if needed. Aggressive scratch removal can blur fine details.
Noise Reduction: Be conservative here. Old film grain is part of the photo’s character. I usually stay around 20–30% unless the noise is truly distracting.
Sharpness/Detail Enhancement: This is where people screw up most. Never go above 60–70% on sharpness. Over-sharpening creates halos and unnatural edges that scream “I used AI on this!”
Face Enhancement: If available, use it sparingly. Modern AI face enhancement can make people look weirdly smooth and plastic. Aim for “restored” not “retouched magazine cover.”
Dealing with Color Photos from the ’70s and ‘80s
Oh man, these are special. The color shifts in old prints are wild — everything turns yellow, magenta, or cyan depending on the paper and storage conditions.
For yellow/brown fading: Most restoration tools auto-correct this reasonably well. If doing manual correction, increase blue channel slightly and reduce red/yellow.
For magenta shifts: Reduce magenta/red, boost green slightly. Be subtle — overcorrection makes skin tones look alien.
For cyan/blue tints: Add warmth back gradually. Too much and you’re back to yellow territory.
FYI, I usually let the AI take a first pass at color correction, then manually fine-tune by comparing to other photos from the same era. You’re trying to recreate how it looked when new, not how you think it should look.
Step 4: Colorizing Black and White Photos
This is where things get fun — and controversial. Colorization is impressive technology, but it’s also fundamentally educated guessing. The AI doesn’t know what color your great-grandma’s dress actually was.
When Colorization Makes Sense
Good use cases:
Photos where you have context clues (uniforms, known locations)
Images where you can verify colors with living relatives
Photos being restored for engagement, not historical accuracy
Personal family photos where approximation is fine
Questionable use cases:
Historical documents where accuracy matters
Professional archival work
Photos that will be presented as factual records
I colorize family photos because my relatives love seeing them in color. But I always keep the restored black and white version too.
Best Colorization Tools
MyHeritage In Color: Most historically accurate, conservative with saturation DeOldify (via various platforms): Very good, slightly more vibrant Palette.fm: Excellent control, lets you guide color choices Hotpot.ai Colorize: Quick and decent for casual use
Pro tip: Run colorization on your already-restored black and white image, not the original damaged version. Better foundation = better colors.
Adjusting AI Colorization
The AI will get some things wrong. Here’s how to fix common issues:
Skin tones too orange? Reduce saturation and shift toward pink/neutral Sky looks weird? Manually adjust to realistic blue gradient Clothing colors seem off? If you know the actual color, manually correct it Everything too vibrant? Reduce overall saturation by 15–20%
Don’t aim for modern photo color saturation. Old photos, even when new, had more muted colors. Slightly desaturated looks more authentic than Technicolor vibrancy.
Step 5: Handling Specific Types of Damage
Different damage types need different approaches. Let me break down the common issues I’ve encountered:
Tears and Missing Sections
AI inpainting has gotten scary good at filling in missing areas. Most restoration tools detect tears automatically, but you can improve results by:
Manually marking the exact damaged area if the tool allows
Using content-aware fill for large missing sections
Processing in multiple passes for complex damage
Checking that AI-generated content matches the surrounding area
I had a photo where a quarter of someone’s face was torn away, and AI restoration rebuilt it so convincingly that relatives couldn’t tell which parts were reconstructed. Technology is wild.
Water Damage and Stains
These are trickier because the damage affects the entire image unevenly. Process in layers:
Address the staining/discoloration first
Then handle texture damage
Finally enhance detail and sharpness
Sometimes you need to manually reduce the opacity of stained areas before AI processing to prevent the AI from “enhancing” the stains.
Creases and Folds
Physical creases create both color distortion and texture issues. Most AI tools handle these automatically, but stubborn creases might need:
Manual cloning to reduce the crease before AI processing
Multiple restoration passes with low intensity
Targeted sharpening around the crease to restore detail
Faded Photos
Pure fading (loss of contrast and color) is actually one of the easiest problems to fix. AI tools excel at this. Just don’t over-correct — aim for realistic vibrance, not Instagram filters.
Common Mistakes That Ruin Restorations
Let me save you from the failures I’ve experienced:
Over-Enhancement Syndrome
This is the #1 problem I see. People crank every slider to maximum and end up with photos that look like AI-generated fever dreams. More enhancement ≠ better results.
Signs you’ve over-enhanced:
Skin looks plastic and pore-less
Edges have visible halos
Colors are unnaturally vibrant
Details look “painted on” rather than photographic
You’ve lost all film grain and texture
When in doubt, back off the intensity. You can always enhance more; you can’t undo over-processing without starting over.
Ignoring Context and History
That colorization made your grandfather’s WWII uniform bright purple? Yeah, that’s wrong. Cross-reference historical records, ask family members, and use common sense.
AI doesn’t understand context — it just sees pixels and applies patterns. You’re the human in the loop who needs to sanity-check the results.
Not Keeping Original Scans
Always, ALWAYS keep your original unedited scans. Storage is cheap; scanning is time-consuming. Save originals in lossless formats, and work on copies.
I organize like this:
/Originals/ – Untouched scans, TIFF format
/Working/ – In-process versions
/Finals/ – Completed restorations, high-quality JPEG or PNG
Forgetting to Adjust for Display Medium
A restoration that looks great on your phone screen might look terrible printed at 8x10. Always view your final results at the intended size and medium before declaring victory.
Zoom to 100% for print evaluation. Check on multiple devices. Show it to someone else for a fresh perspective.
Advanced Techniques for Difficult Photos
Sometimes basic AI restoration isn’t enough. Here’s when you need to level up:
Combining Multiple Tools
Don’t marry yourself to one tool. I frequently use:
Remini for initial face enhancement
VanceAI for damage repair
Photoshop for manual touchups
Topaz DeNoise for stubborn grain
MyHeritage for final colorization
Each tool has strengths. Use the best tool for each specific problem rather than forcing one tool to do everything.
Manual Intervention Points
Even with AI, some things need human judgment:
Reconstructing missing sections: AI guesses, but you might know what should be there. Guide it manually.
Fixing AI hallucinations: Sometimes the AI “sees” details that weren’t there. Remove these artifacts manually.
Color accuracy: AI can’t know that grandma’s favorite dress was blue, not green. Manual color correction fixes this.
Composition improvements: Cropping, straightening, and reframing improve the final result beyond pure restoration.
Working with Extremely Damaged Photos
When photos are seriously messed up, try this approach:
Scan at highest resolution possible — Even if damaged, capture all surviving detail
Make a damage map — Note which areas need complete reconstruction
Process sections individually — Restore salvageable parts separately
Reconstruct missing areas last — Let AI fill in based on surrounding context
Blend carefully — Make reconstructed sections match original texture and tone
I spent 6 hours on one heavily damaged wedding photo using this method. The results were worth it — the photo went from “almost trash” to “worthy of framing.”
Organizing Your Restoration Project
If you’re restoring more than a handful of photos (and you probably are), organization saves your sanity:
File Naming That Makes Sense
Skip generic names like “IMG_0001.jpg”. Use descriptive naming:
Include date, subject, version status. Future you will be grateful.
Metadata Matters
Add metadata to restored photos:
Original photo date
Restoration date
Tools used
Names of people in the photo
Location if known
Any historical context
Programs like Adobe Bridge or even basic Windows file properties let you add this info. When your grandkids find these photos in 50 years, they’ll actually know what they’re looking at.
Backing Up Properly
Restored photos are digital files. Digital files disappear without backups. Use the 3–2–1 rule:
3 copies of every important photo
2 different storage types (external drive + cloud storage)
1 copy offsite (cloud or at a relative’s house)
I use Google Photos for easy access, an external SSD for primary backup, and a second external HDD stored at my parents’ house for catastrophe protection. Overkill? Maybe. But these photos survived 80+ years already — I’m not losing them to a hard drive failure.
Sharing Your Restored Photos
You’ve done all this work — now what?
Digital Sharing Options
For family viewing:
Shared Google Photos albums (easy for everyone to access)
Dropbox or OneDrive folders
Private Facebook albums (if your family actually uses Facebook)
For preservation:
Upload to FamilySearch or Ancestry with proper documentation
Create a family history website
Generate digital photo books
Printing Restored Photos
Yes, print them! Digital files are great, but physical prints have different emotional weight.
Print quality tips:
Use a professional printing service (Mpix, Nations Photo Lab, or local pro labs)
Don’t cheap out on photo paper — go for archival quality
Print at appropriate sizes based on your restoration resolution
Consider creating a family album with restored photos
I printed a collection of restored photos as a surprise gift for my grandmother’s 85th birthday. Watching her reaction to seeing her parents’ wedding photos restored and colorized? Worth every hour of work.
The Bottom Line: Your Restoration Strategy
Here’s my honest recommendation based on how much you’re willing to invest:
Casual restoration (handful of photos, just for fun): Use Remini or Hotpot.ai’s free tier. Quick, easy, good enough for social media sharing.
Serious family history project (50+ photos): Invest in VanceAI or MyHeritage subscription. Process everything over a month or two, then cancel. Total cost: $10–30.
Professional-level results (heirloom photos, client work): Use Photoshop + specialized tools like Topaz. Higher cost but complete control and best quality.
On a strict budget: Use free tools exclusively: Hotpot.ai free tier, GIMP for manual work, and patience. Results take longer but cost nothing.
The “best” approach depends on your specific situation. I’ve done successful restorations with free tools, and I’ve done restorations where I threw $100 at the problem because the photos were that important. Match your approach to the value of the photos and your available resources.
One last thing: don’t wait to start this project. Those old photos are degrading every day, and the relatives who can identify people and provide context won’t be around forever. I’m genuinely glad I started restoring family photos when I did — several key relatives have since passed away, and their insights are now preserved along with the restored images.
Now stop reading and go rescue those memories sitting in your closet. They’re not going to restore themselves. 😊
Comments
Post a Comment